
여러 대의 서버에 애플리케이션을 분산 배포할 때 스케줄러(Scheduler)에 대해 추가적인 고려가 필요합니다.
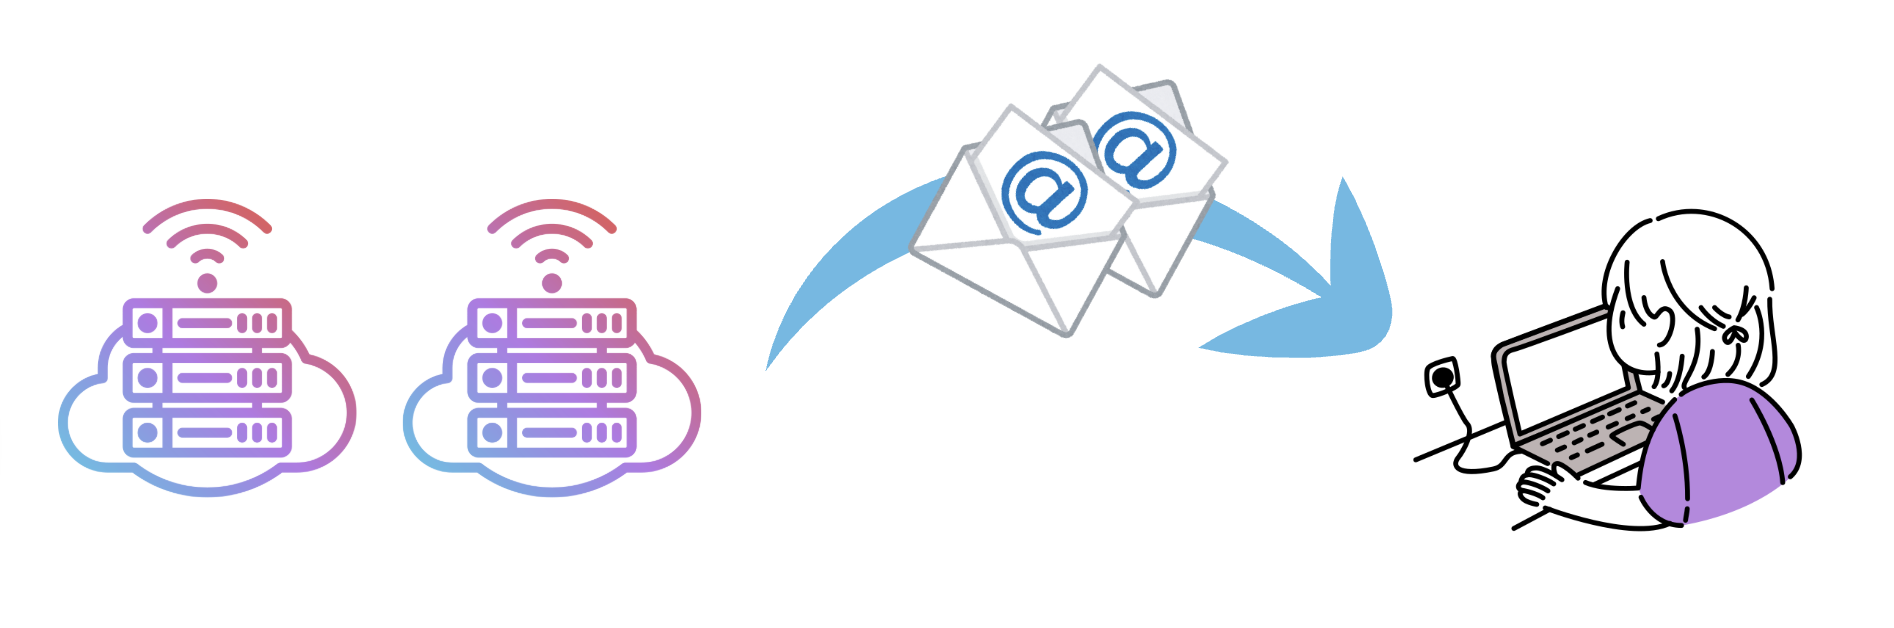
예를 들어, 특정 시간에 이메일을 전송하는 스케줄러가 있을 경우
두 서버에서 각각 동일한 작업이 실행되어 이메일이 중복 전송될 수 있습니다.
이러한 문제를 방지하기 위해 스케줄러에 분산락 AOP 를 적용하는 과정을 포스팅하려고 합니다.
1️⃣ 왜 분산락을 사용하나요?

위의 이메일 중복전송 예시같은 문제들을 방지하기 위해 사용하려는 것이 분산락(Distributed Lock)입니다.
분산락은 여러 서버 또는 인스턴스에서 동시에 같은 작업이 실행되지 않도록 동시성 제어를 위해 사용됩니다.
여기서 말하는 동시성(Concurrency)이란, 여러 작업이 동시에 실행되는 것처럼 보이도록 처리하는 방식입니다.
- 멀티코어 시스템에서는 여러 작업이 병렬로 동시에 실행되기도 하고,
- 싱글코어 시스템에서는 작업이 아주 빠르게 번갈아 실행되며 동시처럼 보입니다.
락의 종류에는 여러가지가 있지만 그 중에서 분산락을 사용하려는 이유는 다음과 같습니다.
1. 다중서버에서 사용할 수 있습니다.
2. AOP 와 함께 사용하여 락 획득 및 해제 로직을 인터셉트할 수 있어서 예외처리에 용이합니다.
3. TTL 설정이 가능하기 때문에 락 자동 해제를 통해서 시스템 안정성을 높일 수 있습니다.
2️⃣ Redisson 설정하기
[1] Redis DB 생성하기
Redis - 가장 빠른 캐시로 더 빠른 경험을 제공하세요
도움이 필요하신가요? 답변을 받아보세요
redis.io
위 사이트에서 로그인을 진행합니다.
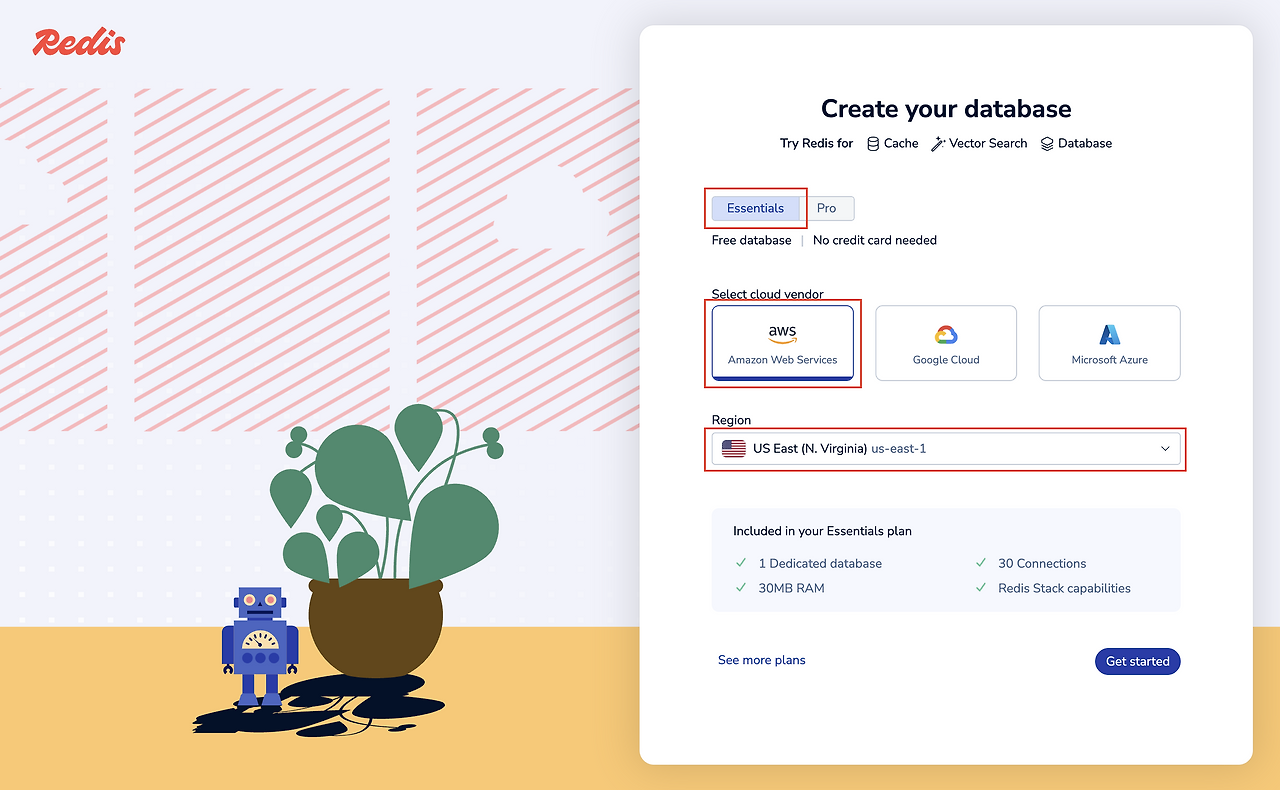
그리고 region, cloud 등을 자신의 환경에 맞는 것으로 선택한 후에 [Get started] 를 클릭합니다.
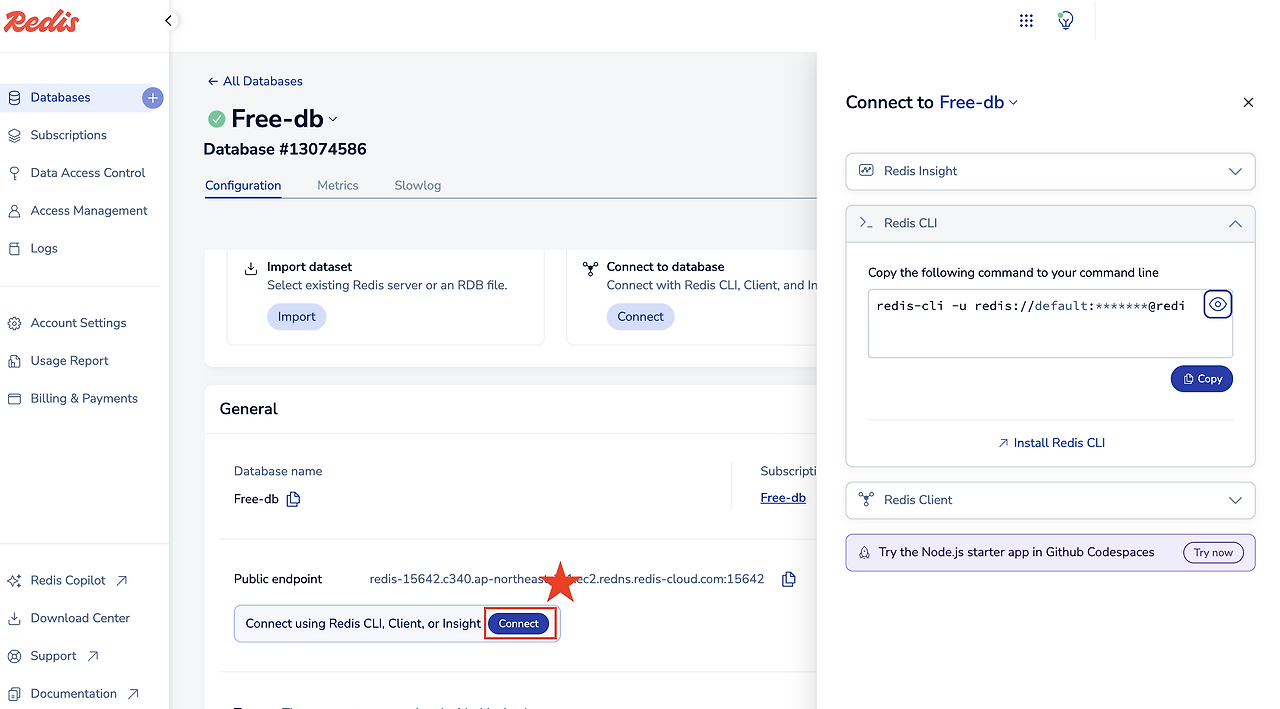
생성된 디비는 위의 사진처럼 [Connect] 버튼을 클릭하여 연결 정보를 확인할 수 있습니다.
[2] 프로젝트에 Redis 설정 추가하기
가장 먼저 의존성을 추가해줍니다. ( 3️⃣ 에서 필요한 것도 미리 추가)
implementation 'org.springframework.boot:spring-boot-starter-aop'  //3️⃣
implementation 'org.apache.commons:commons-lang3:3.14.0'  //3️⃣

implementation 'org.springframework.boot:spring-boot-starter-data-redis'
implementation 'org.redisson:redisson-spring-boot-starter:3.27.2'
[1] 에서 확인한 정보를 활용하여 yml에 설정을 추가해줍니다.
spring:
  data:
    redis:
      host:
      port:
      username: (default)
      password:
그리고 redissonConfig 파일을 아래처럼 생성해줍니다.
import lombok.extern.slf4j.Slf4j;
import org.redisson.Redisson;
import org.redisson.api.RedissonClient;
import org.redisson.config.Config;
import org.springframework.beans.factory.annotation.Value;
import org.springframework.context.annotation.Bean;
import org.springframework.context.annotation.Configuration;

@Slf4j
@Configuration
public class RedisRedissonConfig {

    @Value("${spring.data.redis.host}")
    private String host;

    @Value("${spring.data.redis.port}")
    private int port;

    @Value("${spring.data.redis.username}")
    private String username;

    @Value("${spring.data.redis.password}")
    private String password;

    private static final String REDISSON_HOST_PREFIX = "redis://";

    @Bean
    public RedissonClient redissonClient() {
        Config config = new Config();
        config.useSingleServer()
                .setAddress(REDISSON_HOST_PREFIX+host+":"+port)
                .setUsername(username)
                .setPassword(password);
        return Redisson.create(config);
    }

}
3️⃣ 분산락 AOP 생성하기
[1] @DistributedLock 정의
import java.lang.annotation.ElementType;
import java.lang.annotation.Retention;
import java.lang.annotation.RetentionPolicy;
import java.lang.annotation.Target;
import java.util.concurrent.TimeUnit;

@Target(ElementType.METHOD) //메서드에만 사용가능
@Retention(RetentionPolicy.RUNTIME)
public @interface DistributedLock {
    /**
     * 락에 사용할 고유 키 이름
     * */
    String uniqueKey() default "";


    /**
     * 락 시간 단위 설정
     * */
    TimeUnit timeUnit() default TimeUnit.SECONDS;   //현재 기본값 : 초

    /**
     * 락 대기시간 (락이 이미 점유 중이면 대기할 최대 시간)
     * */
    long waitTime() default 10L;     //현재 기본값 : 10초

    /**
     * 락 유지시간 (락을 획득한 뒤 유지할 시간 (TTL))
     * */
    long lockedTime() default 5L;    //현재 기본값 : 5초


    /**
     * 락이 걸려 있을 경우 기다릴지 여부 설정
     * 기본값은 true(= 대기), false일 경우 바로 실패
     */
    boolean isWaiting() default true;
}
위의 파일을 자신의 환경에 맞게 일부 수정하여 사용하시면 됩니다.
[2] Aspect 정의
import my_study.demo.exception.CustomException;
import my_study.demo.exception.ErrorCodes;
import my_study.demo.response.ResultData;
import my_study.demo.util.MyStringUtil;
import lombok.RequiredArgsConstructor;
import lombok.extern.slf4j.Slf4j;
import org.apache.commons.lang3.StringUtils;
import org.aspectj.lang.ProceedingJoinPoint;
import org.aspectj.lang.annotation.Around;
import org.aspectj.lang.annotation.Aspect;
import org.aspectj.lang.reflect.MethodSignature;
import org.redisson.api.RLock;
import org.redisson.api.RedissonClient;
import org.springframework.expression.EvaluationContext;
import org.springframework.expression.ExpressionParser;
import org.springframework.expression.spel.standard.SpelExpressionParser;
import org.springframework.expression.spel.support.StandardEvaluationContext;
import org.springframework.http.ResponseEntity;
import org.springframework.stereotype.Component;

import java.lang.reflect.Method;

@Slf4j
@Aspect
@Component
@RequiredArgsConstructor
public class DistributedLockAspect {

    private final RedissonClient redissonClient;
    private final ExpressionParser parser = new SpelExpressionParser();
    private final EvaluationContext context = new StandardEvaluationContext();


    private static final String LOCK_PREFIX = "LOCK";
    @Around("@annotation(distributedLock)")
    public Object lock(ProceedingJoinPoint joinPoint, DistributedLock distributedLock) throws Throwable {
        RLock lock = this.getLock(joinPoint, distributedLock);
        log.info("=========================================");
        log.info("lockName : {}", lock.getName());
        log.info("=========================================");
        boolean isLocked = false;

        try {
            if(distributedLock.isWaiting()){
                isLocked = lock.tryLock(distributedLock.waitTime(), distributedLock.lockedTime(), distributedLock.timeUnit());
            }else{
                isLocked = lock.tryLock(0, distributedLock.lockedTime(), distributedLock.timeUnit());
            }

            if (!isLocked) {
                log.debug("[{}] isLocked : {}", lock.getName(), isLocked);
                CustomException e = new CustomException(ErrorCodes.REQUEST_LOCKED);
                return ResponseEntity.status(e.httpStatusCode())
                        .body(ResultData.<String>builder()
                                .body(e.body())
                                .message(e.message())
                                .build()
                        );
            }
            return joinPoint.proceed();
        } catch (InterruptedException e) {
            throw new CustomException(ErrorCodes.LOCK_INTERRUPTED);
        }
    }

    private RLock getLock(ProceedingJoinPoint joinPoint, DistributedLock distributedLock) {
        MethodSignature signature = (MethodSignature) joinPoint.getSignature();
        String className = signature.getDeclaringType().getName();
        Method method = signature.getMethod();

        String uniqueKey = StringUtils.isEmpty(distributedLock.uniqueKey()) ? "" : distributedLock.uniqueKey();
        if(!StringUtils.isBlank(uniqueKey)){
            uniqueKey = (String) getUniqueKey(signature.getParameterNames(), joinPoint.getArgs(), distributedLock.uniqueKey());
        }
        String lockName = MyStringUtil.toRedisKeyName(LOCK_PREFIX, className, method.getName(), uniqueKey);
        return redissonClient.getLock(lockName);
    }

    private Object getUniqueKey(String[] parameterNames, Object[] args, String name) {

        for (int i = 0; i < parameterNames.length; i++) {
            context.setVariable(parameterNames[i], args[i]);
        }

        return parser.parseExpression(name).getValue(context);
    }

}
이때 my_study 패키지에서 import 한 exception 관련 파일들은 이전 포스팅 글 을 참고해주시면 감사하겠습니다.
그리고 중간의 MyStringUtil 의 toRedisKeyName 코드는 아래를 참고해주세요.
public static String toRedisKeyName(String... fields){
        return String.join(":",fields);
    }
4️⃣ 상세설명

[1] Aspect 코드 정리
위에서 작성한 Aspect 코드를 정리해보겠습니다.
private static final String LOCK_PREFIX = "LOCK";락 이름에 사용할 접두사를 정의합니다.
"LOCK" 외에도 프로젝트에 맞게 정의하시면 됩니다.
try {
            if(distributedLock.isWaiting()){
                isLocked = lock.tryLock(distributedLock.waitTime(), distributedLock.lockedTime(), distributedLock.timeUnit());
            }else{
                isLocked = lock.tryLock(0, distributedLock.lockedTime(), distributedLock.timeUnit());
            }
isWaiting() 값에 따라 락 획득을 결정합니다.
- true면 대기 시간(waitTime)을 두고 락 획득을 시도합니다.
- false면 대기 없이(0) 락 획득을 시도합니다.
if (!isLocked) {
                log.debug("[{}] isLocked : {}", lock.getName(), isLocked);
                CustomException e = new CustomException(ErrorCodes.REQUEST_LOCKED);
                return ResponseEntity.status(e.httpStatusCode())
                        .body(ResultData.<String>builder()
                                .body(e.body())
                                .message(e.message())
                                .build()
                        );
            }
락 획득에 실패했을 경우에는 예외코드와 로그를 통하여 확인할 수 있도록 해줍니다.
private RLock getLock(ProceedingJoinPoint joinPoint, DistributedLock distributedLock) {
        MethodSignature signature = (MethodSignature) joinPoint.getSignature();
        String className = signature.getDeclaringType().getName();
        Method method = signature.getMethod();
락을 생성하기 위해 메서드 시그니처 정보를 가져옵니다.
className은 메서드가 선언된 클래스의 전체 이름입니다.
String uniqueKey = StringUtils.isEmpty(distributedLock.uniqueKey()) ? "" : distributedLock.uniqueKey();
        if(!StringUtils.isBlank(uniqueKey)){
            uniqueKey = (String) getUniqueKey(signature.getParameterNames(), joinPoint.getArgs(), distributedLock.uniqueKey());
        }
uniqueKey는 락을 구분하기 위한 고유 키입니다.
이 값이 비어있지 않은 경우 getUniqueKey 메서드를 호출하여 SpEL 표현식을 평가합니다.
String lockName = MyStringUtil.toRedisKeyName(LOCK_PREFIX, className, method.getName(), uniqueKey);
        return redissonClient.getLock(lockName);
    }
클래스 이름, 메서드 이름, 고유 키를 조합하여 Redis 락 이름을 생성합니다.
이렇게 생성한 이름으로 락 객체를 반환합니다.
[2] 왜 따로 getLock 을 정의했는가?
redissonClient.getLock 을 바로 실행하지 않고 getLock 매서드를 커스텀한 이유를
아래의 초초초간단한 스케줄러를 통해 확인해보겠습니다.
package my_study.demo.schduler;

import my_study.demo.aop.DistributedLock;
import lombok.extern.slf4j.Slf4j;
import org.springframework.scheduling.annotation.EnableScheduling;
import org.springframework.scheduling.annotation.Scheduled;
import org.springframework.stereotype.Component;

@Slf4j
@Component
@EnableScheduling
public class SimpleScheduler {

    /**
     * 1분마다 실행되는 매우 간단한 스케줄러
     */
    @Scheduled(cron = "0 * * * * *") // 매 분 0초에 실행
    @DistributedLock(isWaiting = false, lockedTime = 30L)
    public void executeTask() {
        log.info("초초초간단 스케줄러를 통한 확인");
    }
}
그리고 실행하여 얻은 로그는 아래와 같습니다.

(앞서 정의했던 LOCK 접두사가 잘 붙은(?) 것을 확인할 수 있었습니다.)
이렇게 Lock 의 이름을 하드코딩보다는 클래스명, 메서드명, 유니크 키 조합으로 동적 생성하면
전역적으로 일관된 락 키를 유지할 수 있다는 장점이 있습니다.
'SpringBoot' 카테고리의 다른 글
| [Spring] 커스텀 에러 만들기 (0) | 2025.01.04 |
|---|---|
| [Spring] Spring Bean 생성 주기 및 어노테이션 비교 (1) | 2023.05.03 |
| [Spring] @Scheduled 스케쥴링 적용 방법 (0) | 2023.03.08 |
| [Spring] Hikari 이용하여 데이터베이스 연결 관리하기 (0) | 2023.03.02 |
| [Spring] Jpa 이용해서 db 에 entity 추가 (0) | 2023.01.18 |